The first thing you need to do is, to make a file list with all your music files - I did it like this, limiting my interest to FLAC files:
c:\>dir /S /B /ON Z:\*.flac > FILELIST.TXT
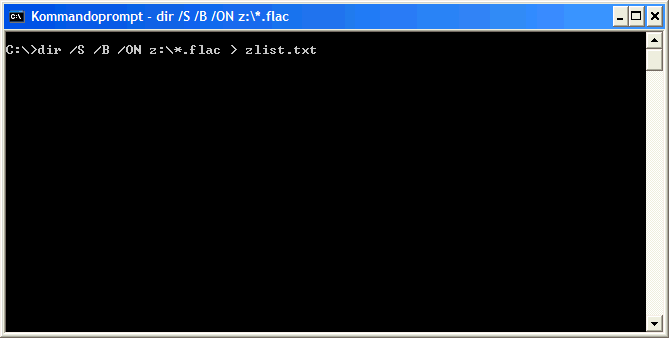
Here's what it looks like:

When you've typed in the string as in the example, press enter. I'm walking you in small steps so that even a person without any previous experience with the command line should be able to follow these instructions.
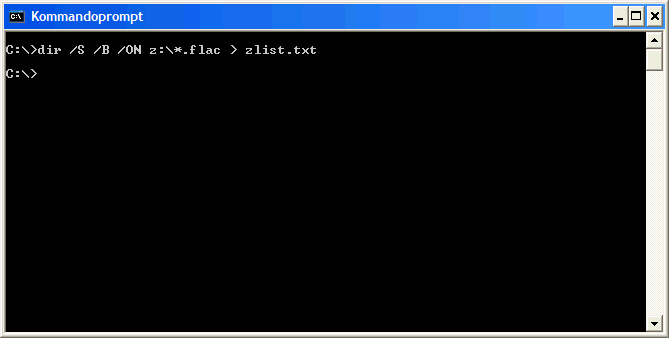
When the execution is done, the prompt shows up again. It looks like this:

In other words, you don't see much - all the output was redirected into the chosen file (in the example named zlist.txt - a name I chose because it reflects that the list is from the drive named Z:).
In this case I dump the filelist.txt file in the root of C: ... which is a perfectly OK place for it. The trick are the options /S (including subdirectories) and /B (brief format, with full path to the filename) and /ON (files ordered by name) to the DIR command. This assures that you get a good list in filelist.txt. It can be seen that my music files are located on Z: - you must substitute this with your own location.
If you want your MP3 files included, execute the following command:
c:\>dir /S /B /ON Z:\*.mp3 >> FILELIST.TXT
The trick here is the double-arrow to filelist.txt, which appends the information (a single arrow will recreate the file, overwriting previous information). You can of course also just select a different name, like e.g. FILEMP3LIST.TXT to contain your MP3 files only.
You need to limit this to music files - otherwise you get .CUE files, cover art and all sorts of files in your list - i.e. you cannot use *.* as a file specification.
When you open a terminal to use the command line, you might not be located at the root ... type cd \ (then press enter) to go back to the root of the drive. I only recommend this in case you're not familiar with the command line / finding files all over your hard drive.
Let us dwell a bit by this solution. For some readers it might come as a hardcore and maybe an undesirable way to do the job. Some people prefer a GUI. Try this - and you might discover the power of the command line. Please give it a chance.
Second, you need to open up the filelist.txt file in a powerful editor (Notepad is good enough for our purpose, initially, but will show its limits quickly, so I recommend that you find a powerful editor). You might be able to use Microsoft Word or OpenOffice Writer. I use a dedicated editor (TSE = The SemWare Editor). It could also be Notepad++ or PowerNotepad, etc.
If the editor supports recording a sequence of keyboard entries, then this can significantly reduce the tedious and time consuming part of the editing job. At any rate, it is faster and safer to edit a file than do the job directly by changing the files on the NAS.
If the editor supports marking a number of columns and rows and doing Search-Replace within the marked area, it is even better.
The first thing to do is to make the filenames readable as a batch job, so make a Search-Replace routine where z: is replaced by REM "z: ... notice the quotation mark in front of the drive letter. Next is to make a Search-Replace routine where .flac is replaced by .flac" ... notice the end-quotation mark. Each line now contains two quotation marks, which embraces the filename. This makes Windows able to read the filename correctly at the command prompt (including the common space characters).
The above routine can make one error - which will happen, if your filename contains .flac in the middle of its name (as well as the file extension being .flac). In this case the filename now contains a "stray" quotation mark (a third quotation mark) which must later be deleted. I personally had no problems (no weird .flac.flac filenames).
If you accidentally execute a batch job with a third quotation mark, the filename will not be recognized - and nothing happens. You're safe.
The second thing to do is to scroll down the list and see if the path and filenames are logical. If it is, then leave the REM at the beginning of the line. If not, then write RENAME. At the same time, remove the stray quotation mark, if you find any.
If some files need renaming, Windows will assume the receiving directory, so it should not be specified a second time. The renaming is only a pure renaming (not moving the file). Example:
.
.
.
REM "z:\Johnny Madsen\Nattegn\10 Sølverbue.flac"
RENAME "z:\HDtracks\1-Nikolai RimskyKorsakov The S.flac" "01 Nikolai Rimsky-Korsakov - The Snow Maiden, Dance of the Tumblers (Reference Recordings, 2001).flac"
RENAME "z:\HDtracks\2-Lucia.flac" "02 Marta Gomez - Lucia (Chesky Records, 2005).flac
RENAME "z:\HDtracks\3-Big Bad Girl.flac" "03 Harry 'Big Daddy' Hyppolite - Big Bad Girl (Analogue Productions, 2001).flac"
RENAME "z:\HDtracks\4-Misery.flac" "04 David Cantor - Misery.flac (Chesky Records, 2000)"
RENAME "z:\HDtracks\5-Wolfgang Amadeus Mozart Viol.flac" "05 Wolfgang Amadeus Mozart - Violin Concerto in G Major KV216 (2L Recordings, 2006).flac"
.
.
.
(In this case five files which were downloaded from HDtracks for free in High Definition 24 bit and 96 kHz FLAC format - see HD Tracks - as a part of their "Ultimate Download Experience" promotion).
Be aware, the Squeezebox Duet is not capable of reading the high-resolution files from HDtracks.
In the example, I didn't structure the files in a path named "Artist" then "Album" because it is a compilation of various artists and music. These are harder to handle, so I put the artist and album information into the filename itself. This is a valuable tip for the organization of your music collection. You can see a normal example in the REM line. Here you can also see that special characters are read wrong. This is only a Windows Command prompt issue, and should be ignored. Leave it as it is, and everything will be good. Finally, you can see how I like the numbers with two digits (with leading zeros) - but our DIR command did sort the files by name properly anyway.
It is my preferred setup that the directory structure follows the logic "Artist" - then - "Album" - then if multiple CD's - "Disc X" where X is 1 or 2 or whatever number (some albums contains more than 10 CD's and in this case the numbers are 01, 02 and so on).
The file is saved as "filelist.bat" ... the file is now a batch-job (not a text file with .txt extension). The advantage of doing it this way is that you can open your filelist file any time, and modify it. The NAS can be turned off, and you can spend time whenever you find a time slot modifying this file "offline."
Even if you don't want to do things as advanced as this, it is very convenient to have a file with all the files in one big list. It is much easier to page-up and page-down in a list and do the editing as it comes up rather than to have to jump in and out of all the directories (online - directly on the disc), then making a decision what to do to fix it.
When you're done renaming files, maybe even creating directories and moving files to the new location within the batch file, to make the setup as logical as possible, just double-click on the batch file in explorer, or type C:\>filelist.bat [enter] in a command prompt.
Here's an example of the process from some files I dumped on the hard drive from a friend, who requested a sound demo:
.
.
.
MKDIR "z:\Phil Collins\Various Phil Collins"
TAG --auto "z:\Phil Collins\*.flac"
MOVE "z:\Phil Collins\*.flac" "z:\Phil Collins\Various Phil Collins"
.
.
.
In a simple case like this, you may as well execute it directly at the command prompt - or use your Explorer. The example also includes auto-tagging the files. For files that need to be renamed on your disk, the lines go into the filelist.bat file
I re-ran the above procedure several times (updating the filelist) to see that things were changing, introducing further modifications, and came closer to the setup I want.
Listing the files in a filelist takes a few minutes.
The tag.exe software has some special features, like you can change filenames so that underscores are converted to spaces. You can see the commands by typing:
C:\>tag --stdout --help | more
The --stdout is what makes it possible to pipe the output through "more" - which is necessary to read it all - otherwise it would just be whizzing over the screen so fast you can't read it. MORE is a piece of software that holds the output and displays one screen at a time - to get the next screen just push a key on your keyboard (any key). The --stdout command also makes it possible to pipe the output to a file. We will need to do this later, when we're done changing filenames and get to the tags editing process.
You can insert empty lines in the batch file for organizational convenience.
Take your time. After all, you can return to the job several times to complete the job. Also, save frequently. If you make a mistake, just undo (if your editor supports this) or exit the file without saving the last part of the job. This is truly a powerful work method.
The next steps will show you how to change the file tags utilizing the same batch procedures as used above for reorganizing the file and directory structure.
First, you redo the job, creating a list of files (now with the desired filenames):
c:\>dir /S /B /ON Z:\*.flac > TAGLIST.BAT
Again, the first thing to do is to make the filenames readable for Windows as a batch job, so make a Search-Replace routine where z: is replaced by tag.exe --stdout "z: ... notice the quotation mark in front of the drive letter. Next is to make a Search-Replace routine where .flac is replaced by .flac" >> ztaglist.txt ... notice the end-quotation mark. Each line now contains two quotation marks, which embraces the filename. This makes Windows able to read the filename correctly at the command prompt. The double right-arrow is a pipe, which creates and appends lines to the file named ztaglist.txt.
The above procedure assumes tag.exe is in your path. If this is not the case, write the full path as in c:\Programs\Tag\tag.exe.
The idea is that each line contains tag (w. stdout option) + filename + pipe to batch file ... when the batch file is executed, it will send all the outputs from tag into the file ztaglist.txt and from here you can view all the tags.
Executing this batch file can be very verbose, unless you insert an "echo off" at the top of the file (on a line of its own), but I do not do this because I actually like to see the strings being executed in the batch file, so I can see how things are going during the process.
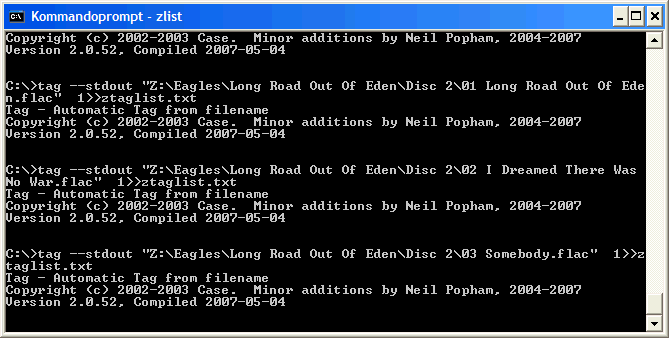
This is what it looks like, as the batch file runs:

If any of the tags are not OK, write a batch job that changes it. The output found in ztaglist.txt looks like this:
Z:\Patricia Kaas\Scene de Vie\01 Generique (Theme Montmajour).flac
Format:  FLAC
Details: 44100 Hz Stereo, 626 kbps, playtime 00:52
Tag:     FLAC
Title:   Generique (Theme Montmajour)
Artist:  Patricia Kaas
Album:   Scene de Vie
Year:    1990
Track:   01
Genre:   Chanson
Comment:
This procedure can take hours, since the batch file executes the tag.exe software (with --stdout option) and appends the pipe to the end of the file. Tag has to open the file and read the tags, then generate the output. It is much slower than using features of the command line (like REM, DIR, MOVE, RENAME and so on) and sometimes TAG comes to an apparent stop. It seems to me that some files are hard to read.
Although this process can take some time, it is fast - much faster and more powerful than accessing your files through a GUI software.
With the new tag filelist, you can study, e.g. what genres are used. Just type on the command line:
C:\>FIND "Genre: " ztaglist.txt
If you want line-numbers you can type FIND /N "Genre: " ztaglist.txt (Linux users use different software instead of FIND, like GREP). FIND /? gives you a short help.
You can also see for example "Artist: " this way instead of Genre ... to see what artists you have in your music library. It is also a way to find potential spelling errors.